Before going to start lets have a look on IIS in Recent Times
If you think back a few years to IIS 5.0, the future for Microsoft's web server looked rather bleak, because network-savvy worms such as Nimda, Code Red, Code Red II, and their variants were affecting thousands of computers worldwide, and rapidly damaging IIS's reputation. Microsoft introduced the IIS lockdown tool to combat these exploits and, with the release of IIS 6.0, made "locked down" mode settings the default at installation, which helped minimize such security problems, and helped IIS 6.0 recapture a major part of trust that IIS 5.0 lost. No major security disasters have been reported since the release of IIS 6.0.
A market survey (Netcraft Web Server Survey—April 2007 ) indicated that Microsoft's IIS has a 31.13 percent market share, which places it in second position behind the open source Apache Web Server. Another survey by Port80 Software that takes Fortune 1000 companies into consideration reports that IIS has overtaken Apache among Fortune 1000 sites.
Figure 1. IIS 7.0 Core Components: IIS 7.0 is composed of three core components.
Now, Microsoft is looking to consolidate IIS 7.0's position as a secure and robust web server.
Now, Microsoft is looking to consolidate IIS 7.0's position as a secure and robust web server.
 | |||||||||||||||||||||||||
| Figure 1. |
IIS 7.0 Core Components
IIS 7.0's core components differ from those in IIS 6.0. IIS 7.0 is made up of three core components as illustrated in Figure 1.
Protocol Listeners: A protocol listener listens to specific requests based on a specific protocol and sends the request to the IIS worker process for processing. Protocol listeners provided with IIS 7.0 include HTTP.sys, NET.TCP, NET.MSMQ and NET.PIPE.
WWW Service: This service acts as a listener adapter for the HTTP.sys protocol listener and monitors the HTTP requests.
Windows Activation Service (WAS): WAS is a new service in IIS 7.0 that manages application pool configuration and worker processes. In IIS 6.0, this responsibility was part of the WWW Service. The shift to a separate core component ensures that developers can use the same process model and configuration for both HTTP and non-HTTP based sites. It is possible to configure the other three protocol listeners (NET.TCP, NET.MSMQ and NET.PIPE) using WAS.
Figure 2. IIS 7.0 Pillars: The figure shows the five major focus areas of IIS 7.0 in which Microsoft made improvements.
For example, when the NET.TCP protocol listener is configured it listens for TCP requests. WAS can also be used to host a Windows Communication Foundation (WCF) based service.
For example, when the NET.TCP protocol listener is configured it listens for TCP requests. WAS can also be used to host a Windows Communication Foundation (WCF) based service.
 |
| Figure 2. |
IIS 7.0 Pillars
Apart from the change in the core components Microsoft made various changes in five major focus areas. These five areas (see Figure 2) form the pillars of IIS 7.0.
Apart from the change in the core components Microsoft made various changes in five major focus areas. These five areas (see Figure 2) form the pillars of IIS 7.0.
Now Installing IIS 7 on Windows Server 2008
Since the IIS web server is not installed by default, the first thing we have to do is install IIS as a role for the server we are working on.
1. Click on Start -> Administrative Tools -> Server Manager
1. Click on Start -> Administrative Tools -> Server Manager
2. In Server Manager scroll down to Roles Summary, and click on Add Roles
3. The Add Roles Wizard starts at this point and warns you that if you are going to add a role to make sure:
The administrator account has a strong password
Network settings, such as static IP, are configured
The latest security updates from Windows Updates are installed
The administrator account has a strong password
Network settings, such as static IP, are configured
The latest security updates from Windows Updates are installed
4. Click Next to go the Add Server Role page. Place a checkmark next to Web Server (IIS) and then click on the button Next
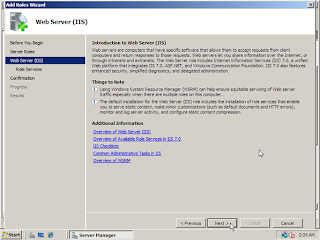
5. The next page will give you some basic information on IIS Web Servers and a few links with extra information if needed. Click on the button Next to continue
6. The next window is the Select Role Services. This very important screen will allow you to add only the modules necessary for your planned installation of IIS.
When you choose a module in this screen in the upper right corner you will get more information about what the module is for. For our example we are going to load the following modules:
Static Content – Lets the Web server publish static Web file formats, such as HTML pages and image files.
Use Static Content to publish files on your Web server that users can view using a Web browser.
Default Document – Lets you configure a default file for the Web server to return when users do not specify a file in a URL.
Default Documents make it easier and more convenient for users to reach your Web site.
HTTP Errors – Allows you to customize the error messages returned to users’ browsers when the Web server detects a fault condition.
Use HTTP Errors to provide users with a better user experience when they run up against an error message. Consider providing users with an e-mail address for staff who can help them resolve the error.
HTTP Redirection – Provides support to redirect user requests to a specific destination.
Use HTTP redirection whenever you want customers who are using one URL to actually end up at another URL. This is helpful in many situations, from simply renaming your Web site, to overcoming a domain name that is difficult to spell, or forcing clients to use a secure channel.
HTTP Logging – Provides logging of Web site activity for this server.
When a loggable event, usually an HTTP transaction, occurs, IIS calls the selected logging module, which then writes to one of the logs stored in the files system of the Web server. These logs are in addition to those provided by the operating system.
Request Filtering – Screens all incoming requests to the server and filters these requests based on rules set by the administrator.
Many malicious attacks share common characteristics, like extremely long requests, or requests for an unusual action. By filtering requests, you can attempt to mitigate the impact of these types of attacks.
IIS Management Console – Provides infrastructure to manage IIS 7 by using a user interface.
You can use the IIS management console to manage a local or remote Web server that runs IIS 7. To manage SMTP or FTP, you must install and use the IIS 6 Management Console.
7. Click Next to get to the Confirm Installation Selections screen to verify your chosen settings.
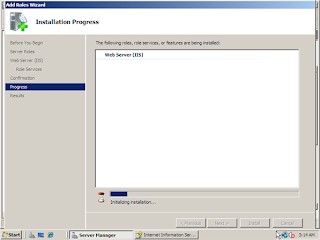
8. Click Install and installation will start
9. After installation you should see the Installation Results page. Click Close to finish the process.
10. In the Server Manager window, under Roles Summary, you should now see Web Server (IIS)
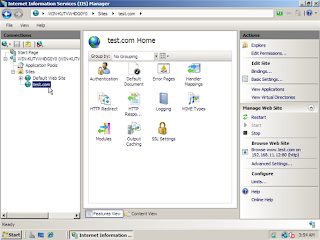
11. Let’s go ahead and open IIS Manager by going to Start -> Administrative Tools -> Internet Information Services (IIS) Manager
12. Once IIS Manager opens, expand out the web server and then expand the Sites folder. Right click on sites and then click on Add Web Site
13. In the Add Web Site window we have some basic information to fill out for a static site:
Site Name – Name of the site, this will be either domain.com or *.domain.com (Where * would represent a sub domain name such as www or blog for example)
Physical Path – The location on the local server that will hold the files for the website. If you did not set this up beforehand you can create a folder through this interface
Type – choose either http or https depending on whether your site will use Secure Socket Layer (SSL) certificate or not
IP Address – From the dropdown you can specify what IP the website should answer on or use the default switch of All Unassigned
Host Name – If you would like this site to respond to other domain names you can put these here
You have now installed IIS 7 and configured a static website. Just place your html files in the directory you specified when creating the site and you are good to go.


No comments:
Post a Comment